

Mirror polish injection molds
What is a Mirror Polish Injection Mold?
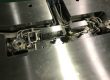
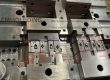
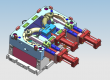
A mirror-polish injection mold features an exceptionally optical, smooth, and highly reflective cavity surface finish, achieving what the plastics industry classifies as an SPI A-1, A-2, or A-3 surface finish.
This level of ultra-high gloss is achieved through a multi-stage, high-precision manual and mechanical polishing process that eliminates microscopic surface imperfections, tool marks, and recast layers.
Mirror-polished molds are vital for applications requiring crystal clarity, high light transmittance, or flawless high-gloss aesthetic finishes, including:
Medical Devices: Fluidic channels, transparent housings, and diagnostic cuvettes.
Optical Lenses & Light Guides: Automotive lenses, LED diffusers, and optical sensors.
High-End Consumer Electronics: Glossy black bezels, premium display windows, and cosmetic packaging.
Mold Polishing
Step-by-Step Mold Polishing Process & Technical Tips
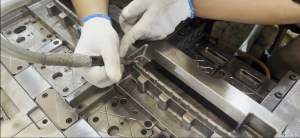
Achieving a true optical-grade mirror finish requires extreme patience, specialized tools, and precise technique. Below is the standard engineering workflow for high-gloss mold polishing:
1. Rough Polishing (Removing Machining & EDM Marks)
Initial Tooling: Use a high-speed rotary polisher (35,000–40,000 RPM) or an ultrasonic polishing machine equipped with a Φ3mm wheel (WA #400) to remove EDM white spark layers and CNC milling chatter.
Oil Stone Grinding: Progress through oil stones lubricated with kerosene in a strict sequence: #180 → #240 → #320 → #400 → #600 → #800 → #1000.
Cross-Lapping Technique: Always apply a balanced 40° to 70° cross-hatch pattern with strokes between 40mm and 70mm. Tip: Never polish in only one direction, as this creates uneven grooves.
2. Semi-Fine Polishing (Sandpapering & Defect Prevention)
Abrasive Sequence: Transition to abrasive sandpaper lubricated with kerosene, progressing from #220 → #320 → #400 → #600 → #800 → #1000 → #1200 → #1500.
Hardness Consideration: Note that #1500 sandpaper should only be used on hardened tool steel (≥ 52 HRC). Using ultra-fine sandpaper on pre-hardened steel can cause surface burning and degradation.
Preventing “Orange Peel” & Edge Rounding: Use hard wooden or bamboo backing sticks angled at 45° to support the sandpaper. Limit passes to 10–15 strokes per area. Over-polishing with soft backing materials (like rubber) causes elastic bounce, leading to the dreaded “orange peel” texture and unwanted edge rounding on mold cores and cavity inserts.
3. Fine Diamond Paste Polishing (Optical Mirror Finish)
Coarse Diamond Compound: Apply diamond abrasive paste with polishing felts or lap cloths in the following order: 9μm (#1800) → 6μm (#3000) → 3μm (#8000) to eradicate hair-line scratch marks left by #1500 sandpaper.
Ultra-Fine Diamond Polish: Finish with soft wool felt pads using ultra-fine diamond compounds: 1μm (#14000) → 0.5μm (#60000) → 0.25μm (#100000).
Cleanroom Requirement: High-precision polishing (≤ 1μm) must be performed in a temperature-controlled, cleanroom environment. Microscopic dust, airborne particles, or humidity can scratch a surface that took hours to refine, causing the tool to be rejected during CMM inspection.
Partner with CNMOULDING for High-Gloss Tooling Excellence
CNMOULDING is a premier precision injection mold manufacturer located in Shanghai, China. We specialize in custom SPI A-1 mirror-finish mold fabrication and high-gloss plastic injection molding.
By combining advanced optical polishing techniques with optimized cooling channel designs, we deliver molds that guarantee flawless surface aesthetics, shortened cycle times, and competitive tooling costs.
Facing surface finish defects or planning a high-gloss plastic project? [ Contact CNMOULDING Engineering Team Today ] for a free DFM review and instant quote.